Tech Tips with Steve Turchet
by Steve Turchet Dimly Seen The instrument panel lights are very dim on my CCKW. I have installed new 6 volt bulbs, but that didn’t help. – Williams The instrument…
by Steve Turchet
Dimly Seen
The instrument panel lights are very dim on my CCKW. I have installed new 6 volt bulbs, but that didn’t help. – Williams
The instrument panel lights ground through their housings to the dashboard. If the mounting hole and/or the lamp flange get rusty, this can cause dim light. Likewise, if the lamp socket is corroded, try cleaning the units with a wire bush or crocus clothto see if that brightens things up.
Correct Clamp
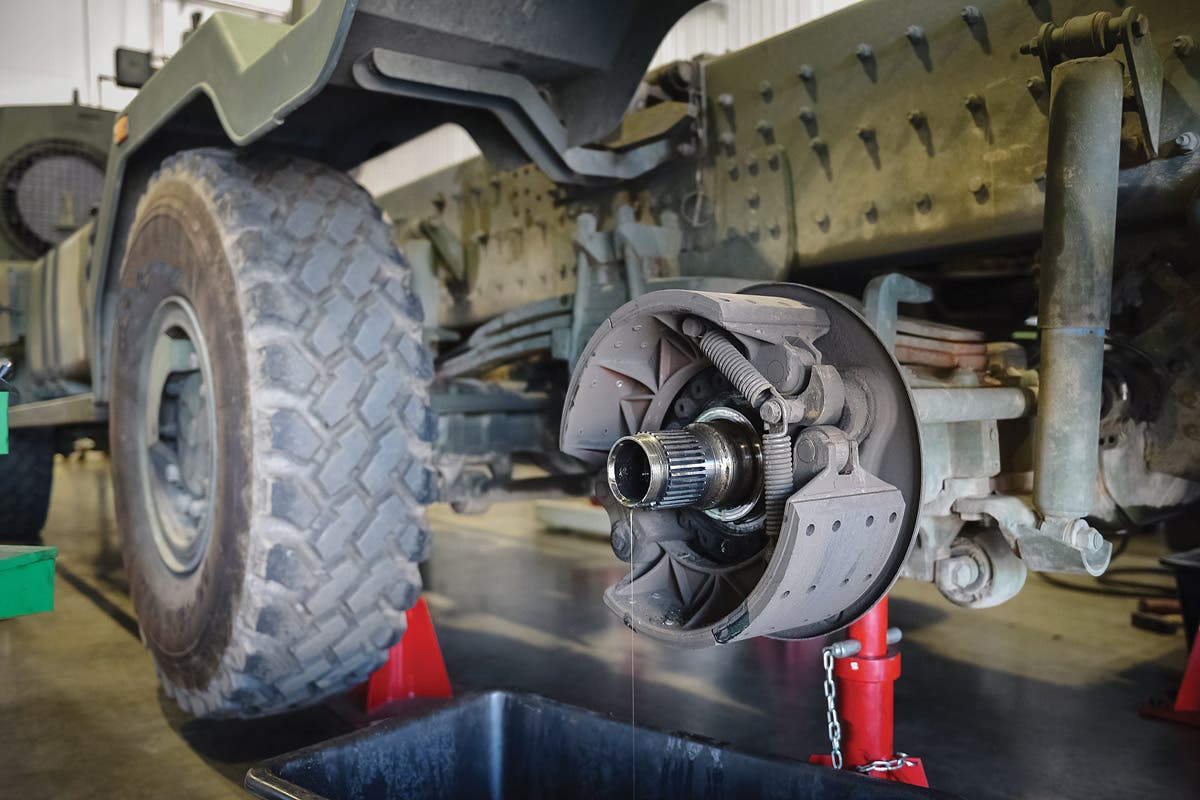
If you’ve just finished brake maintenance, the last thing you want happening to your HMMWV is brake failure! But it can happen to HMMWVs with serial numbers 299,999 and below if you don’t give them the special attention they need. Whenever you pull maintenance on any part of the brake system, make sure the loop clamp (NSN 5340-01-189-7640) that holds the brake line to the caliper on the right side of the vehicle is installed. If you don’t, you could be super-sorry! Your HMMWV’s brakes may not fail right away, but the jostling and rubbing could eventually lead to a long walk home. – PS Magazine
Don’t Unbolt!
You’ve got a lot of gear on while in full battle rattle. And that can be pretty uncomfortable when riding around in your HMMWV. Some soldiers have figured out that you can recline a HMMWV’s commander seat by removing bolts, resulting in a more comfortable ride. But what seems to be a good idea can really be a bad idea in disguise. Tampering with a HMMWV’s commander seat compromises safety. Without all the bolts, the seat will recline back all right, but it also could flop forward too far if you’re in an accident or if you have to stop quickly. That could get you hurt! Safety is more important than comfort. Keep all of the seat bolts in place. – PS Magazine
Suspended
Having problems with suspension and steering components on older HMMWVs? You no longer need to order each and every part individually. TACOM and the PM for Light Tactical Vehicles developed a kit to improve the suspension and steering components, especially those with add-on armor.
The new suspension and steering upgrade kit comes with NSN 2530-01-524-7319. The kit includes the pitman arm, idler arm, center link, upper and lower controls arms, ball joints, rear springs and shocks found on the M1097A2 vehicle for the rear of basic and A1 HMMWVs. This kit is estimated to take 14 hours to install, with frame welding required. HMMWVs in SWA will have the kit installed when they to go through the TWV Refurbishment Center, so see your DLA Customer Service Representative or TACOM LAR for more information before you order. One thing to keep in mind with this kit: It will not change the gross vehicle weight (GVW) or allowable payload of your vehicle. That would require several other configuration changes for performance and safety reasons. Kits are being procured and managed by DLA (S9C).
Work continues on incorporating recommended changes to the kit (such as front springs, front shocks, tie rod assemblies, and radius rods), which will not only allow the kit to be used as an upgrade, but still makes it a great kit for the repair of suspension/steering components on a tired HMMWV. – PS Magazine
Is Two Too Many?
I have an early model Ford GPW that I am restoring for D-Day landing configuration. I know that early WWII jeeps first came with hand-operated windshield wipers. Then they were issued with one vacuum wiper motor on the driver’s side and one hand-operated wiper on the passenger side. I have also seen old WWII pictures of jeeps with two vacuum wiper motors. Which configuration would be correct for a D-Day landing jeep? – Alan
By 1944, the most common windshield wiper configuration for jeeps in the European Theater was one vacuum motor for the driver and one hand-operated wiper on the passenger side. However, by that time, supply was catching up with demand in regard to wiper motor retro-fit kits, and many motor-pools, as well as jeep drivers, were installing two vacuum motors. Of course, by then, there were also many boneyard and damaged jeeps from which to salvage parts. It would therefore be safe to say that a D-Day landing jeep would probably have a least one vacuum wiper motor on the driver’s side, but would still be correct if it had two.
To Shim, Or Not To Shim
I have six Dodge VCs I bought a few years ago from an orchard. As I’m sure you know, these trucks were made before Dodge standardized the WC vehicles.
I am rebuilding two trucks, an open cab and a closed cab, using parts from the others and I have a problem with mating the front drive shaft on one truck to the transfer case I put in from another truck. Even with all the extra parts, I don’t have a drive shaft with a U-joint that will fit the output yoke on one of the track’s transfer cases. The U-joint cross shafts are different sizes and the caps are also different sizes.
I was able to find a Spicer conversion U-joint with the right size crosses, one of which fits the transfer case, but the other set of caps is too small for the drive shaft even through the cross length is correct. I thought about making shims for the caps but several experts told me never do this. What’s your opinion? – J.T.
I encountered the same situation with my ’65 Nissan Patrol L60. The front output yoke on the Dana 18 transfer case I installed uses a smaller U-joint cross shaft and caps than the Patrol drive shaft. I also found a Spicer conversion U-joint with the correct size shafts and caps that fit the transfer case yoke, but smaller diameter caps than used in the Patrol driveshaft yoke.
Not having the benefit of “expert” advice, I found a piece of tubing at a scrap yard with an outer diameter that was a good press fit into the drive shaft yoke and also, with a bit of rat-tail filing, a good interior fit for the U-joint caps. I cut two pieces the same length as the caps with a pipe cutter, tapped the caps into them, then tapped the now-shimmed caps into the drive shaft and installed the retainer clips.
That was twenty-four years and several hundred-thousand miles ago, and I’ve never had a problem with that U-joint.
Check the Points
Distributor breaker points eventually erode and/or burn out, and their gap closes up as the rubbing block wears away, so they have to be replaced. On the other hand, points may often simply be cleaned and reset, and should be examined at fairly regular intervals.
Like many vehicle components, ignition points wear out gradually, and one may not notice subtle signs that they should be cleaned and reset... though may not need replacement. Some of these often overlooked signs are the engine not starting as quickly as one may recall, occasional misfiring, lower idle RPM, rougher idle, and/or hesitation when accelerating.
Again, any or all of these signs may come on gradually and not be very noticeable at first, but if your vehicle seems to be displaying any of them, check the points.
Jumpy Speedo
The speedometer needle in my 1960 M37 has started to jump from zero to ten when I first start out. Then it varies about ten or fifteen mph when I’m driving. Is it worn out? – Tanner
Possibly. However, the first thing to check is the speedometer drive cable. The inner cable should be pulled out, cleaned and lubricated about every two years on vehicles that are driven fairly often. If not kept clean and well-lubed, the inner cable winds up like a spring then suddenly unwinds, causing the speedometer needle to jump at low speeds and/or give erratic readings at higher speeds.
Ideally, the entire cable (inner and outer) should be removed from the truck, the inner cable pulled out and cleaned, and the outer cable (or housing) flushed out with solvent, then blown dry with compressed air. If the inner cable is frayed or damaged in any way it should be replaced. If intact, it should be well lubricated its entire length with light grease and reinserted into the housing. Don’t use heavy grease, because that may also cause a jumpy or erratic speedometer, especially during cold weather.
Unless the speedometer head is making noise, most problems are usually in the drive cable. Cables should be routed so they don’t have sharp bends (though most M37 cables do have a sharp bend at the transfer case). It’s usually best not to heavily lube the cable within six inches of the speedometer because grease can work its way into the head and gum it up.
M-series speedometers (as well most WWII units) can be opened, cleaned and lubricated, and will often give many more years of service.
Could Be Snappy
I’m converting my ’42 WC-63 from 6- to 12-volt. I know most of what to do, but will the 6-volt fuel gauge work on 12 volts or will it burn out? Should I use a resistor? – Jim King
Some 6-volt fuel level gauges will work on twelve volts, though their needles may “snap” to attention much more quickly. I converted a CJ3B from six to twelve volts and its six-volt fuel gauge worked fine.
You could experiment at your own risk by temporarily giving the gauge twelve volts to see what it does. If it seems to work and gives an accurate reading, you’re probably okay.
Alternatively, you could install a resistor. If so, make sure it’s one meant for use on gauges, not one of those big heavy ones meant for heater motors.
Heavy
I bought a ’42 Chevrolet G506.Someone said it needs 140 weight oil in the transmission. True or false? What about the transfer case and axles? – Glenn
Most GM trucks with that type of 4-speed spur gear transmission used 140 weight gear oil, unless operating in very cold temperatures. 140 would probably be best in your truck for any clime that doesn’t freeze water. That type of transmission is rather primitive, and heavier oil tends to smooth out the clash of shifting gears. The transfer case and differentials usually use 90 weight. Also the winch gear case. My best advice, though, is to get a manual and follow its recommendations.
Yes
Were sealed units for WWII jeep tail lights also made in 12 volts besides 6? – B. Rosen
Yes. There were some twelve volt vehicles in WWII, most notably, Dodge carryalls used for Signal Corps service. They also made standard sealed tail lamp units in twelve volts, as well blackout driving lamp units that will also fit jeeps. For blackout marker and instrument panel lights, just replace the six-volt bulbs with twelve-volt bulbs.
HMMWV Shudders
I just replaced the brake pads in my 1998 M998A1. Now it shudders when stopping. What did I do wrong? – Tim
Hopefully, nothing. If you didn’t chamfer the edges of your new brake pads (which don’t normally come chamfered), they will usually do what you described until they wear in. You can either put up with this, or try making a series of fairly hard (but not panic) stops from around 45 mph. Thisshould help to wear in the new pads.
All Secure
I’ve received many letters over the years, usually from folks who have recently acquired an HMV, asking about or suggesting ways to make their vehicles “secure” from theft, since most stock MVs don’t have key lock ignition switches. Some of the suggestions seem rather elaborate and complicated, to say the least.
While it’s generally true that if a professional thief wants a vehicle bad enough and has the opportunity, he or she will usually get it. A steering wheel locking device such as “The Club” seems like one of simplest and most effective ways to keep someone from driving away with your jeep, Mutt, M37, M35, or HMMWV. Keep in mind that most chains and cable locks are easily cut with bolt-cutters.
Dark And Dirty
Most of us know that brake fluid becomes dark and dirty over time and should be changed every two or three years by bleeding the old fluid out of the wheel cylinders and refilling the master cylinder with new fluid. Though most of us also know that conventional brake fluid is hygroscopic (meaning it absorbs moisture and is the primary reason it should be renewed), do we ever wonder from where the dark and dirty residue originates?
Mostly, it is from the black rubber seals and cups in the master and wheel cylinders as they gradually wear from sliding back and forth. This is normal and unavoidable, unless we never use our vehicles’ brakes.
However, the rubber parts of a brake system also deteriorate over time, and if you find your brake fluid becoming dark and dirty more rapidly and/or your vehicle’s master cylinder needs topping off more often, it may be time to replace or rebuild your master and wheel cylinders.
Under Pressure
What should hot oil pressure be on a HMMWV at idle? –Dave Morton
Most show about 30 psi at hot idle on the stock gauges.
Distribution
I have a mostly stock and unrestored 1942 Ford GPW. My grandfather bought it as Army Surplus in 1948, and it has been on our ranch ever since.
The engine has been rebuilt three times. The transmission, transfer case, clutch, and other things have been rebuilt or repaired when needed. My question is: Do distributors ever wear out? If they do, how can you tell? – Dean
Distributors do indeed wear out. The primary wear in distributors, such as used on your GPW, occurs on the shaft bearings and centrifugal advance mechanism.
As the shaft bearings wear, the shaft starts to wobble as it rotates. Though this wobble may be slight, it’s often enough to cause an erratic dwell – meaning that the point gap changes – which can result in a rough idle and/or misfiring that can’t be corrected by carburetor adjustment. Wear on the centrifugal advance mechanism can result in hesitation upon acceleration and sluggish or erratic engine performance.
Rebuilding distributors is neither rocket science nor watchmaking, and just about anyone fairly handy with tools can do it. Complete rebuild kits for many HMV distributors and most vintage distributor parts may be purchased from companies that advertise in this magazine, and may also be found on the web.
The components of most common vintage distributors of the same manufacturers often interchange, so buying one or two extra distributors when found at a good price should give you enough parts to keep your jeep running another sixty-four years.
Ohm
I have eight WWII vehicles Dodges, GMC trucks, and two jeeps. The fuel gauges in two of my Dodges and one of my jeeps don’t work. I have tested them and t seems like the gauges are ok but the sending units in the tanks don’t work.
I see a lot of replacement sending units on Ebay that are adjustable for different size tanks, but how can I be sure they will work with my gauges? – Mike Tedrowe
Most common fuel level gauges of any manufacturer like AC, Stewart-Warner, King Seely, etc., operate by resistance. This means that the ohm range of the sender determines how the gauge needle will read. For example, if a gauge is connected to a sender with the wrong resistance range, it may show FULL when the fuel tank is empty, or only half full when the tank is full, or may not work at all.
The best way to determine the right ohm range for any gauge is to test its sender with an ohmmeter. Of course, if your sender doesn’t work this is a problem. Alternatively, you might have a working sender in another vehicle of the same type you could test, then order a replacement sender with the same ohm range. If not, it’s basically down to cross your fingers and hope, because most senders aren’t returnable after purchase. But, if it doesn’t work, at least you’ll know what not to buy next time.
Below is a listing of ohm ranges for most common fuel gauge senders, which may be helpful.
(Empty/Full)
0-90 Ohms: Works on most GM vehicles, 1965 to present
73-10 Ohms: Works on most Ford vehicles prior to 1989, and most Chrysler Corp. vehicles
240-33.5: Industry standard, works on many vehicles
0-30 Ohms: Works on most GM vehicles prior to 1965
16-158 Ohms: Works on most Ford vehicles, 1989 & newer
The Hole Truth
I have a 1956 CJ3B that was a Navy jeep. It had 15” aftermarket spoke wheels when I bought it, but I want to go to 16” wheels that look right. I have a junk Ford pickup with 16” wheels and the lugs are the same as the jeep and fit on the rear but the center holes are too small for the front hubs.
I don’t have the money to spend right now for five new 16” wheels. I thought about cutting out the centers of the Ford wheels, but how can I do that so they will be accurate to be balanced?
Been there, done that. In my case, it was fitting 16” 6-lug GM truck wheels to my 1965 Nissan Patrol. Same problem: Fit the rear but not the front.
Once upon a time tire shops used spin-balancing machines that mounted wheels by their lugs, so it didn’t matter if the center holes were true. Nowadays, most shops use machines that mount wheels by a center spindle. So, if the center isn’t true, they can’t be accurately balanced.
Like you, I’m usually on a budget and couldn’t afford to buy all new Patrol wheels or have the centers cut out of GM wheels by a machine shop. Then, it came to me that by using two hole saws mounted together, the smaller saw fitting snugly into the wheel’s existing center and acting as a guide for the larger saw, (which is the size of the Patrol’s front hub), I could make an accurate cut with my half-inch drill. I had these wheels spin-balanced – they balanced fine!
Make sure the saws are for metal, and use plenty of oil when doing the cutting.


