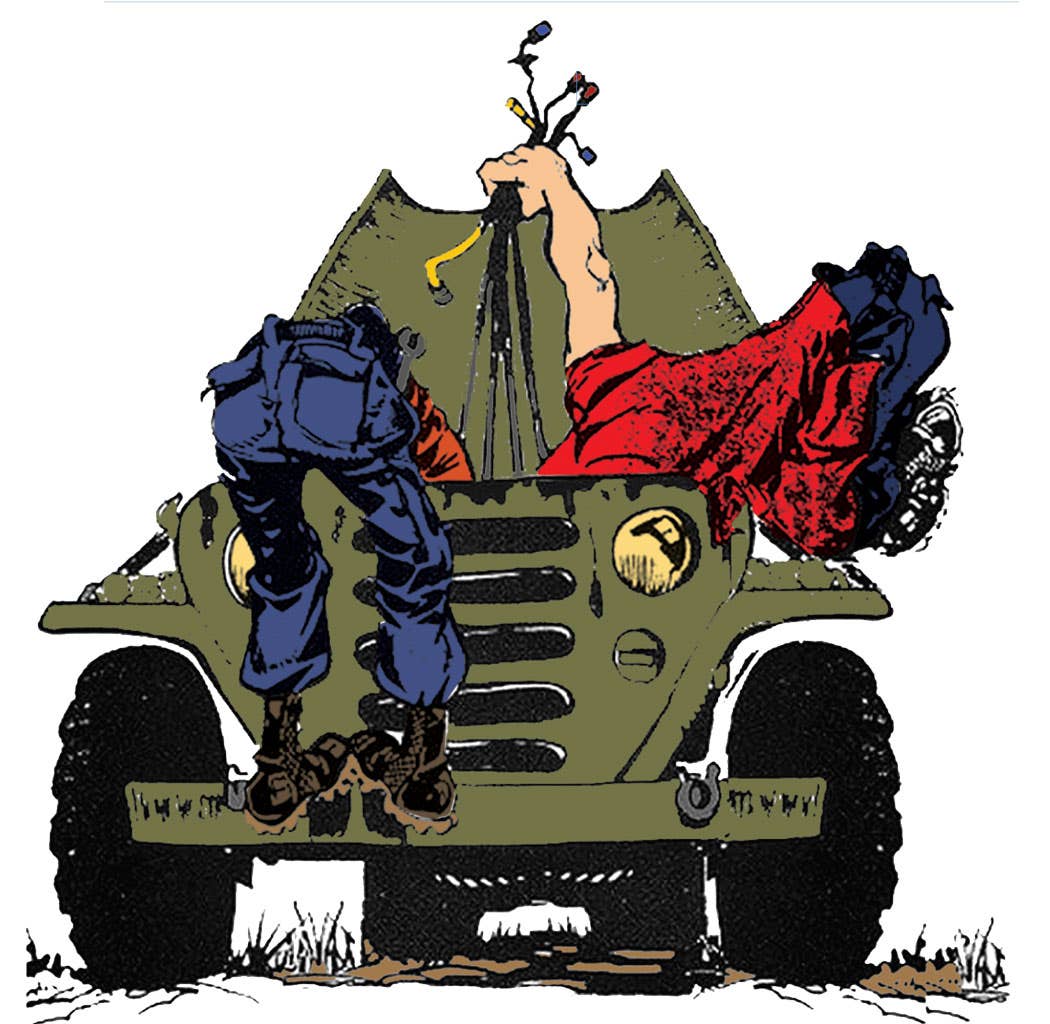
Discovering a ‘barn find?’
by Steve Turchet A question that many historic military vehicle (HMV) owners are often asked about their vehicles (besides, “is it hard to find parts for?”) is where they acquired…
by Steve Turchet
A question that many historic military vehicle (HMV) owners are often asked about their vehicles (besides, “is it hard to find parts for?”) is where they acquired it. As many enthusiasts know, the general public usually assumes that “Army trucks” are purchased at government auctions where brand-new WWII Jeeps in boxes sell for fifty dollars a dozen. However, those of us in the hobby often have much more interesting tales to tell about how and where we found our vehicles. These often include some amusing or adventurous stories about how we got our treasures home.
While some HMV folks do buy their vehicles from government surplus dealers — many of whom offer their wares in this magazine — and other vehicles are indeed purchased at government auctions, most vintage military vehicles come into our hands from private sources. We become aware of them through ads in this magazine or other vehicle publications, on eBay or other internet sites, and/or through ads in local papers.
Sometimes, we simply spot a vehicle in someone’s driveway or out in a field, and often when we’re not looking for one. These are generically called “barn finds,” and there are often interesting tales about discovering a vehicle, learning its history (or provenance), and how its new owner got it home.
Just about any barn find can be trailered, including basket-cases. Many barn finds are towable, while a few can actually be driven home after fairly simple preparation. However, what is towable or trailerable (and probably should be) is transformed into “driveable.” That’s what this article is about.
AFTER THE DISCOVERY
The adventure usually begins after the vehicle has been purchased. In many cases, the vehicle’s new owner has been told by the farmer/rancher/miner/logger, “She was runnin’ when we parked her twenty years ago.” What often happens is the new owner decides that instead of renting or borrowing a tow bar or trailer, they are going drive the vehicle home.
I have done this many times, often from the desert or bush. Usually, it was because I lacked the funds or equipment to either trail or tow the vehicle. For many people, there’s really no necessity to try to drive a barn find home —but there’s usually no necessity to climb a mountain, either.
While every situation has been a little different for me, there are also similarities, especially in the stories of others who’ve driven barn finds home — or tried to. The same mistakes are often made.
A lot of time may be wasted by not doing things in a logical order when it comes to inspecting a barn find, getting it started and making it mobile. In some cases, a vehicle simply can’t be driven — and shouldn’t be. The sooner you find this out — preferably on the same day they make the purchase — the less time will you will waste trying to do the impossible.
For example, a guy once told me of spending an entire day dismounting all ten wheels of a barn find M35. He hauled them, two at a time, in his car to the nearest town to air them up, only to discover at sunset, that the truck’s engine was seized! Someone else told me of a day spent firing up an M37 only to discover the truck was missing its transfer-case.
INSPECT WHAT YOU BOUGHT
The only reason such embarrassments occur is because people don’t take the time to thoroughly check out a vehicle before they decide they can drive it home. Usually, the vehicle’s former owner was telling the truth: The vehicle had been running when parked. What he might fail to tell you, however, parts were removed over the years. In other cases, parts may have been stolen, or “borrowed” by friends or family members.
Actually, there are only few basic things that need to be checked to determine if there’s at least a chance that a barn find can be started and driven. First, it should be obvious that no vehicle is going anywhere under its own power if its engine is seized up. If you have jumper cables, it’s a simple matter to try the starter on vehicles with 6- or 12-volt electrical systems to see if the engine is free. For vehicles with 24-volt systems, 12 volts may not be enough to turn an engine that’s been sitting for years.
However, on most vehicles, you can put the transmission in neutral, grab the fan, push down on the fan-belt with one hand to keep it tight, and turn the engine enough to see if it’s free. A hefty screwdriver or small pry bar on the flywheel teeth will also serve to turn the engine. If it’s free, and you trust the former owner’s word that it was indeed running when parked, there is usually a chance it can be started.
Even if it seems to be stuck, there are ways to break an engine free, if, as is sometimes the case, its piston rings are just lightly rusted to the cylinder walls. Still, I’ve only had about a fifty-fifty success rate of freeing up frozen engines in the field. So, you may want to consider the towing/trailering options if a vehicle’s engine is stuck.
On the other hand, if a vehicle’s engine can be turned over, the next step is to make sure that all the major and minor components required for self-propelled mobility are still present and connected to each other.
Besides the large and obvious — does the vehicle still have its transmission, transfer-case, drive shafts, axle shafts, differential third-members, and steering system — check that the transmission and transfer case levers aren’t rusted solid. Also determine whether the steering wheel at least tries to turn the front wheels — even if the tires are flat or sunk in the ground.
The vehicle’s hydraulic service brakes probably won’t work, but hopefully that’s only due to loss of fluid. Of course, if it has air brakes, you will have to get the engine running to see if they work. For the moment, though, make sure that the brake and clutch pedals are operational and still equipped with return springs (small parts like return springs are some of the common items often missing from a barn find). Also check for an accelerator linkage return spring along with a spring or springs for the parking brake system. If any of these are missing or are so badly rusted they may break, take measurements, and buy new ones before you return.
Even if the clutch pedal works, it’s possible that the clutch disk is rusted to the flywheel and/or pressure plate. Many people don’t discover this until after they get an engine running.
A simple way to check if the clutch disk is stuck is to put the transmission and transfer case in gear, push the clutch pedal down (either have someone hold it down or block it down with a stick, if working alone), then turn then engine over either by hand or with the starter. If the clutch has released, you’ll be able to turn the engine. If not, either the engine won’t turn, or it will try to move the vehicle when turned over. A rusted clutch disk can sometimes be freed in the field. We’ll get to that later.
Now you have ascertained that the engine will at least turn over, the clutch is operational, and the vehicle has all its mobility components. But, don’t dust off your hands and walk away planning to return and drive your barn find home next Saturday after a few hours of tinkering. If you leave now, you may be spending next Saturday amusing the clerks at the nearest auto parts store.
It is a wise time to fill the vehicle’s radiator with water. A leaky or damaged radiator or rotten or missing radiator hoses should be instantly apparent. After filling the cooling system, you should also be able to spot leaking soft plugs or external cracks in the engine block.
Freeze cracks in an engine block are almost always located at the bottom of the water jacket and run horizontally. If such cracks are discovered, they are not necessarily a reason to abandon your field resurrection. Various products, such as K.W. Block Sealer, can temporarily seal engine block cracks, even major ones. You may still be able to drive the vehicle home, though you will probably have to get another engine, or at least a block, later on.
Internal cracks in an engine block or cylinder head are harder to find because they leak into the cylinders or oil pan. Unless you expect freezing temperatures, leave the cooling system full of water and check the oil level on the dipstick. If, after you return, the radiator is low and there’s been a rise in the oil level, there is probably either a leaking head gasket or internal cracks in the engine block and/or cylinder head. A block sealer product may still enable you to drive the vehicle home, though you may want to put more consideration into towing or trailering options.
The condition of a vehicle’s tires is of obvious importance if you hope to drive it for any distance. In many cases, when a vehicle has been sitting for years, one or more of its tires will be flat, and there is seldom a spare. Even if the tires still hold air, check them carefully for deep cuts, serious weathering, and age cracks.
You may be fooled when dealing with ancient tires that are completely flat and/or look as if they couldn’t roll ten feet without falling to pieces. Sometimes, they will hold up just fine.
On the other hand, tires that look very good will sometimes disintegrate in less than a mile. It’s smart to have at least one good spare. I’ve found that even rotten old tires with nylon cord tend to hold together, at least at low speeds over short distances, while good-looking tires with rayon cord may quickly fall apart. Most WWII HMVs had rayon cord tires.
Large HMVs with dual rear wheels give a margin of safety because you can dismount one of the duals if it fails or use it as a spare for a front wheel. In the case of four-wheeled vehicles, buy or borrow at least one spare wheel and tire. If one or more tires are completely flat, check for missing valve cores... another item often missing on barn finds. There are inexpensive electric tire pumps available at most auto parts stores, along with aerosol can tire inflators, which may save you the trouble of dismounting wheels and hauling them “into town” for air. A pump may also come in handy if a tire goes flat while driving the vehicle home.
After checking the condition of the tires and making appropriate plans in that department, examine the engine again. Make sure it has everything it needs to start up and run. For example, does it have all its spark plugs and are they intact.? What about the spark plug wires, distributor-cap, rotor, and ignition coil?
Has that WWII jeep, Dodge WC, or Chevrolet G506 been converted from six to twelve volts? Or, has that M38, M37, M151 or M715 been converted from 24 to 12 volts? Write down the distributor number or take note of its make and model so you can bring back new tune-up parts. Even better, remove the distributor (after marking its position) and take it home to clean and tune-up before you return. You may also want to buy a new coil, spark plugs and wires. Check that the vehicle has battery cables (another often “borrowed” item).
Again, check the radiator hoses and fan belts. Even if the hoses didn’t leak when you filled the cooling system, you may want to replace them before taking to the road. Old hoses are like old tires: There is no reliable way to judge how long they might hold together. The same applies to aged fan and accessory belts. Just like spark plugs and ignition components, you’ll have to replace them anyway, so why not now when you obviously need them?
Other things to check are flexible brake lines, fuel system hoses, and lines to the oil filter and oil pressure gauge; also, air or vacuum hoses. Check the choke cable to see if it’s rusted solid. You will probably need a working choke to start the vehicle. If you don’t think the cable can be freed up, take measurements for a replacement. Likewise, check the throttle cable, if the vehicle has a hand throttle. Hand throttles are handy — no pun intended.
Check that the vehicle still has an exhaust system, including a muffler. Check that the fuel tank hasn’t rusted out. If it’s still partly full of ancient fuel, you may have to bring back suitable containers in which to dispose of it.
The same applies to the engine oil, which you will want to change before trying to drive the vehicle home. You may also want to remove and clean the oil pan, and will probably need a new gasket, plus sealer. Also make note of the oil filter type.
You can usually perform all these inspections in an hour or two. You may be very glad you did.
IT’S TIME TO GO BACK TO GET THE VEHICLE
What sort of things should you bring when you return to start up your barn find? Besides a good tool set and any parts you’ve decided you need, you should have a good battery, or batteries, of the proper size and voltage. You should have a suitable towing chain or rope, and hopefully a chase vehicle that’s large and powerful enough to tow your new treasure if it breaks down. You should have jumper cables, extra primary wire, electrical tape, and containers of fuel and water. If the vehicle has hydraulic brakes, bring at least a quart of brake fluid.
Here are some other things to consider: It isn’t wise to attempt to drive a vehicle that’s been sitting for years with the oil that is now in its crankcase. The oil is likely contaminated with water from condensation — at a minimum.
For the engines of most vintage HMVs, buy the cheapest 30-weight you can find. In fact, buy several quarts more than that particular engine takes. The reason for using cheap oil is you don’t yet know if the engine will start or what condition it might be in, so there’s no point in buying expensive oil. The reason for bringing extra oil is you may break an oil line along the way or the engine may be a “petroleum princess.” You should also have a new oil filter element.
Bring at least ten feet of either 5/16” or 3/8” inch fuel hose, with appropriate clamps, plus one or two in-line fuel filters. It’s probable you may have to bypass parts of the fuel system between the tank and the fuel pump and/or the fuel pump and carburetor. It’s also possible that the fuel pump won’t work, or may fail on the road, and you may have to rig up a gravity feed with a jerry can. Or, the vehicle’s fuel tank leaks and you’ll use the jerry can connected to the fuel pump. Even if the fuel system is operational, it would be wise to install an in-line filter.
Also bring rolls of bailing wire and duct tape. Gasket paper might also come in handy, along with gasket sealer, though you can use just about any kind of thick paper to make a gasket.
Bring an oil squirt can for linkages, choke cables, etc. Unless you have only a few miles to travel, bring a grease gun, several tubes of grease, and enough gear oil for a complete change in the vehicle’s transmission, transfer case, and differentials. 90 weight gear oil is suitable, even though the spur-gear transmissions of some older MVs should have 140 weight oil for normal use.
DON’T FORGET THE LAW
Depending upon the type of vehicle, its condition and location, and the distance and terrain it has to travel, other items should come to your mind. As far as legality, some states issue or sell permits to drive an unlicensed vehicle from one place of storage to another. Unless your proposed trip is to be made on rural back roads or across open desert, it would be smart to plan on meeting a cop.
What about insurance? Some policies cover the acquisition of a new vehicle for a limited time. Check with your agent or company. Buying extra liability coverage could be well worth the expense if your barn find’s brakes fail and you rear-end a brand new Ferrari. If possible, make your journey by daylight, and start in the morning to give yourself plenty of time.
THE DAY TO GET IT
Anyway, you’ve arrived in the morning with all the stuff you think you’ll need, including a helpful and enthusiastic companion. There sits your barn find — though maybe not actually in a barn — looking twice as battered and rusty as you remembered.
You might as well get down with the fact that, no matter what its former owner said, there was a reason why it was parked and you’ll either discover it now, or when you try to drive it.
No doubt your new treasure would look more impressive with air in all of its tires and the weeds or cactus cleared away, but the first thing you should get to is the heart of the matterL Will the engine run?
If it was free to begin with and hasn’t acquired another gallon of “oil” since you filled the radiator, you can skip the next paragraph. However, if the engine was stuck, here’s my 50/50 success method of getting it loose in the field:
If the spark plugs are located in wells, such as on most L-head engines, clean out all the dirt and debris so it doesn’t fall into the cylinders before removing the spark plugs. Remove all the spark plugs and fill each cylinder with brake fluid. Of all the preparations ever advised to free up frozen engines, I’ve found that ordinary brake fluid works best.
Trying to turn a stuck engine with the starter may damage the starter. A good stout screwdriver or pry bar applied to the flywheel teeth has more turning force than most starters.
With the cylinders full of brake fluid, put the transmission in neutral, get underneath the vehicle and try to turn the engine. If it moves even a little, keep rocking it from one direction to the other with your screwdriver or bar.
Chances are good that it will gradually turn a little farther in each direction until finally you get a complete revolution. Turn it over a few more times, then hook up the battery and turn it over a dozen times with the starter to blow the brake fluid out of the cylinders and loosen things up. Beware that the brake fluid will spout or spray from the spark plug holes: don’t let it get in your eyes, and be sure to warn your companion.
Clean and replace the spark plugs, or install new ones, after checking for the correct gap. Obviously, we don’t have the space in this article to go into detail about checking out the fuel and ignition systems step by step.
I have written two articles about trouble-shooting HMV electrical and fuel systems in the field, and you can find these in MVM issues nos. 98 and 99 (if you’re a long-time reader, you can find earlier versions in nos. 14 and 17).
FIRE IT UP
Follow these procedures in the suggested order and you should save a lot of time. About all I can add in regard to your present situation is to check the carburetor to make sure it isn’t heavily varnished or badly corroded inside, and the float and needle valve are free and operational. Use your oil squirt can to lubricate all the carburetor, accelerator, choke, and throttle linkages. Make sure the return spring closes the carburetor butterfly. You don’t want the engine to rev out of control.
When you have spark at the spark plugs and clean fresh fuel being delivered to the carburetor, you’re just about ready to attempt a start up. But first, drain the old oil and put in the new. Also service the oil filter if you came prepared to do that.
Make sure the cooling system is full of water. If the starter, generator, or distributor have oil cups, fill them. If the water pump has a lube fitting, grease it. Make sure the fan and accessory belts are tight.
Next, examine the exhaust system. That old engine is going to blow a lot of red-hot rust flakes out of the pipe. If the vehicle is sitting in a field of dry grass, it would be wise to determine where the exhaust is going to come out and clear the area of flammables. It is also possible there’s a rat’s nest up the exhaust pipe or inside the muffler.
Of course you have a fire extinguisher and extra water? (I once had a WWII half-ton Dodge pickup set what was left of its bed-boards on fire because of hot rust flakes blown out the exhaust pipe. It makes an amusing story now, but it wasn’t funny at the time to be driving a vehicle with a bonfire in back.) Also clean the engine exhaust manifold of any leaves or flammable debris.
Just prior to startup, pour a thimbleful of gas down the carburetor. Beware that if the engine backfires, it may blow flame from the carburetor throat. Keep your face away and your fire extinguisher handy! Likewise, warn your companion.
When the engine starts, do not rev it any higher than is necessary to keep it running. The oil has long since drained out of all the bearings and internal parts. You want to give the engine lots of gentle time to pick up and circulate the new oil.
If the reason the vehicle was parked was a loose connecting rod or a broken piston, you’ll find that out soon enough without blowing it out through the block and destroying your chance of rebuilding the engine by over-reving it now. As soon as the engine can be idled without your attention at the carburetor, hop into the cab and make sure there is oil pressure indicated by the gauge. If you have a companion, he or she should have already been instructed to watch the gauge.
If the gauge doesn’t register, shut off the engine and find out why. A line could be broken to the gauge or oil filter, or an oil gallery fitting or plug may be missing and oil is spurting out somewhere. If you suspect the gauge itself is bad, loosen a fitting somewhere on its supply line and restart the engine. If oil squirts out, then you know there is pressure in the engine and the gauge doesn’t work.
If you do have oil pressure, check the water level in the radiator and top off if necessary. Some vehicle cooling systems can’t be filled all the way if the engine isn’t running or the thermostat isn’t open. Also look for bubbles in the radiator which could indicate a leaking head gasket.
If everything seems okay, let the engine warm up. If the generator is charging, as indicated by the ammeter or voltmeter, that’s a plus. If not, sometimes a few light taps with a screwdriver on the voltage regulator will make it start charging.
Check that the temperature gauge is working. If so, it should start rising. However, if it keeps on rising and the radiator begins to boil, the thermostat is probably stuck. You will have to remove or replace it to drive the vehicle home.
If the engine temperature stabilizes in a normal range — usually somewhere between 160 and 190 degrees, or midway up the gauge dial — try to shift into gear. If the clutch disk is free, you will know it now for sure.
Shift into first or reverse and, even if the tires are flat or sunk in the dirt, check if the vehicle tries to move. (Also be sure the transfer-case is in gear.) If the transmission just grinds when you try to shift into gear, the clutch disk is probably rusted to the flywheel and/or pressure plate. Sometimes it can be broken loose by shutting off the engine, shifting into high gear, and holding the clutch pedal down while trying to restart the engine. If that doesn’t work, try having your companion hold the clutch pedal down (or block it down with a stick) then get under the vehicle to see if you can loosen the disk with a broad-bladed screwdriver or large knife. Try not to damage the clutch facing material.
If that procedure doesn’t work or can’t be attempted because you can’t reach the clutch disk, about the only other thing that can be done in the field is to tow the vehicle a few hundred feet with the transmission in high gear and the clutch pedal held down.
If the clutch does work and the vehicle seems to want to move, or if you’re going to try to tow the vehicle to free the clutch, now is the time to attend to the tires. (You haven’t wasted time on them because you’ve done things in a logical order, first getting the engine started, and then finding out of the vehicle will move.) Air up or change the tires — whatever it takes to get the vehicle rolling.
If you’re working in a flat area, you probably won’t need the service brakes yet. However, if you’re on a hillside, you’ll want to get the brakes working as soon as the tires are fit to roll. It’s possible that the parking brake is rusted in the on position. If so, deal with that now.
I have driven many old vehicles home with only the parking brake to stop them. That was back in my careless days, though,and I don’t recommend you do the same.
Hopefully, you can get the vehicle’s service brakes working by simply adding new fluid and bleeding them. I assume that anyone attempting a field resurrection project would be familiar with basic hydraulic brake systems and how to bleed them. If you aren’t, you may want to watch a YouTube video or two before attempting to bleed them.
For vehicles with air brakes, there are naturally other things to check including the compressor and air tanks. Inspect them for leaky lines or fittings. Vintage air brake systems often have a separate unloader valve. You may have to release this before the system to build up pressure.
ON THE ROAD
You should now be able to drive the vehicle clear of the poison ivy or jumping cactus. Check the levels in the transmission, transfer case and differentials, and add new oil if necessary. Or change all the oil if you came prepared to do that. Use your grease gun to lube all drive-train, steering system, and chassis and suspension fittings.
You may want to remove and clean the oil pan now, but you shouldn’t have to change the oil again. If the vehicle’s lighting system works, so much the better, though, hopefully, you won’t be traveling after dark. If sunset is near, it might be wiser to come back tomorrow, or next week, rather than risk a journey at night.
Once on the road, take it slow and easy. Gear down on upgrades and don’t lug or high-rev the engine. Stop to check the tires and wheel bearings frequently (put your hand on the wheel hubs to see if they’re getting hot). Keep a close watch on the engine temperature and oil pressure gauges.
Even if you get home with no problems, you’ll still have an interesting tale to tell. It will probably help other HMV folks if they ever stumble across a barn find.


